This blog post may contain affiliate links. Affiliate links give a small commission of a sale to the affiliate(me). Products are at no extra cost to you.
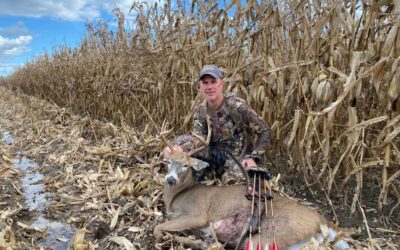
Congratulations! You have made a lethal shot and now you are standing over a whitetail deer. But now what do you need to do? You must gut or field dress the deer.
Gutting a deer can be extremely hard and confusing for the first few deer that you kill. These instructions will guide you through the process. The instructions will be as clear as possible; however, with each lethal shot comes its own unique feel for the deer.
Table of Contents
What Tools You Will Need
The Process of Gutting a Whitetail Deer
Why Gut a Deer Quickly
Taking the Deer to the Processor
Conclusion of Gutting a Deer
The Best Gutting Tool on the Market
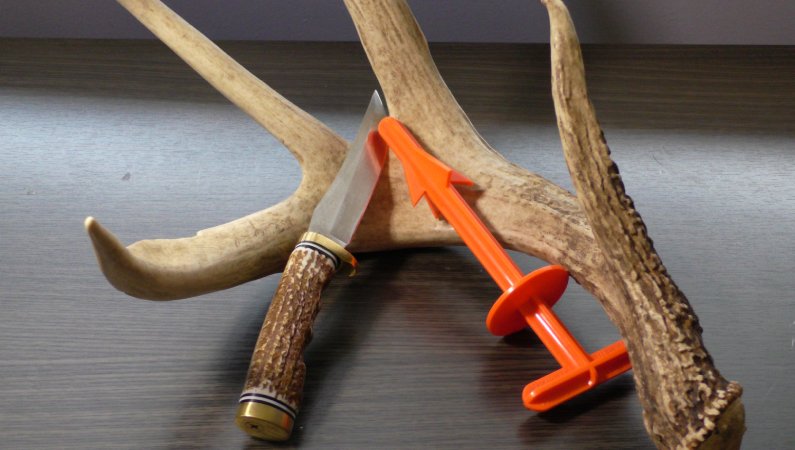
The Butt Out 2 is by far the best tool for speeding up the process of gutting/field dressing a deer. Honestly, it can cut down to time by over 10 minutes. I recommend this product to every hunter and have gifted it to hunters in my family and they love it! I will get into how to use it in the step-by-step instructions.
What Tools You Will Need to Gut/Field Dress a Whitetail Deer
These tools will all aid you in the process of gutting/field dressing your whitetail deer. You only need a sharp knife but if you are like me and want to make the process as quick and clean as possible there are a few other inexpensive items you may want.
1. A Sharp Knife Meant for Gutting Whitetail Deer
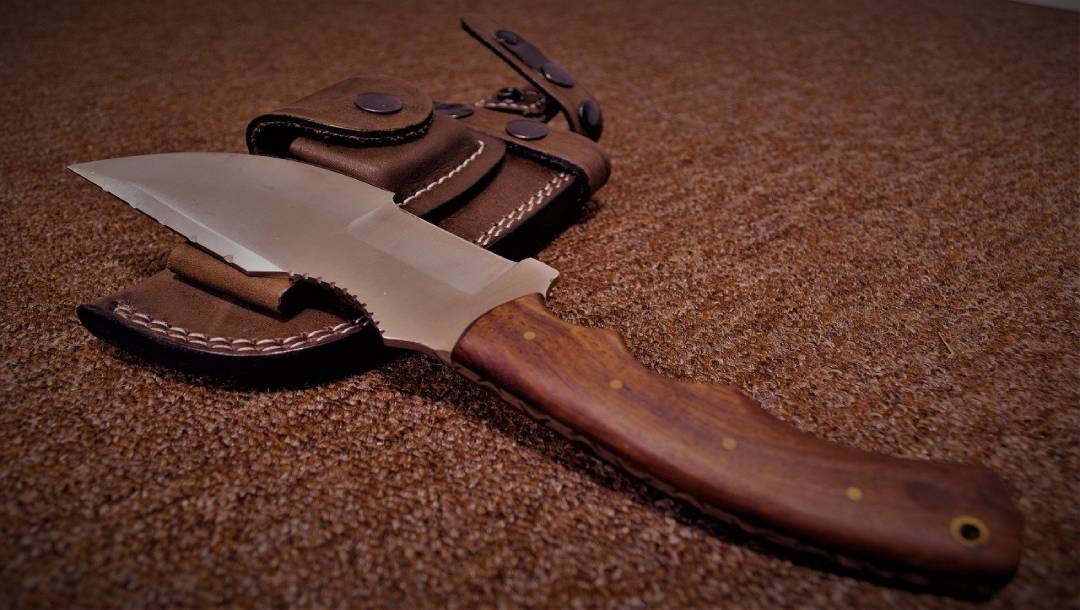
The most important tool you will need is an extremely sharp knife. As you will be gutting through muscles, fat, skin, and hair it is essential that you have an extremely sharp knife. If the knife you have goes dull fast the entire process will be a pain to finish.
Save yourself time and frustration by getting yourself a sharp knife that is meant for field-dressing animals. I recommend using the Mossy Oak Fixed Blade Gut hook Knife. It comes with a gut hook too which is extremely useful for step #2. Also, it is a fixed blade so it will not fold in on your hand while you are gutting a deer.
If you want a whole knife set for gutting deer, I recommend the Field Dressing Kit which is the best seller on Amazon.
2. The Butt Out 2 By Outdoor’s Specialties
This tool is by far my favorite tool in my backpack. The Butt Out 2 makes the process of gutting a whitetail buck or doe faster and easier. It is used to start the process of gutting or field-dressing your deer. It also gives you the perfect dimensions for cutting out the anus of the deer.
The Butt Out 2 is under 20 dollars and will save you over 20 minutes of struggling to get the anus out of the deer. Get a Butt out 2 Here on Amazon… You won’t regret it!
3. Elbow High Gloves
It is no secret that after you shoot a deer and are ready to field-dress that deer, you will be getting a little bloody. You can prevent getting blood all over your arms and clothes by purchasing some gloves that go all the way up to your arms.
Get some elbow-high gloves Here on Amazon to make the gutting process less messy for yourself.
4. A Sled to Drag the Deer
A sled is my favorite tool to use while dragging my deer out of the woods. You want to have some sort of dragging tool to ensure that dirt and bacteria do not get in the open cavity after you have gutted the deer.
A sled also makes it easy to go over fallen trees, small trees, and any other obstacle in the woods. If you can drive close to the dead deer then you may not need a sled. I like to always have one with me just in case I cannot drive my truck in the fields near the woods.
Check the Prices of the Jet Deer Dragging Sled Here on Amazon (This is the same sled that I have used for about 3 years)
The Process of Gutting/Field-Dressing a Whitetail Deer
This is the step-by-step field-dressing/gutting process that I have used on all my whitetail deer over the years. It is by far the quickest and easiest way to field dress a deer. It may seem hard the first 2-3 times that you are gutting your own deer; nevertheless, the more you do it the better you will become.
Step 1: The Anus
I like to start at the anus of the whitetail deer. Cutting the anus properly will allow everything else to come out of the cavity smoothly later.
Start by flipping the deer on its back and holding the hind legs so you can see the deer’s anus. Then you will want to use the Butt Out 2 by Hunter’s Specialist. Start by inserting the tool into the anus until the orange ring hits the deer. Then use your knife to cut about 4-6 inches deep all the way around the orange ring.
After you have made the cuts, it is time to twist the Butt Out 2 clockwise until you hear a pop sound. This pop sound will be the severing of where you just cut. This will then allow you to pull out the tool and connected to it will be the ‘poop shoot’. Inside will be deer poop.
You will then want to cut the ‘poop shoot’ right at the tip of the Butt Out 2. Grab hold of the ‘poop shoot’ and squeeze the poop out until you can tie a not in the ‘poop shoot’ stopping any deer poop from getting inside the deer cavity.
Boom the worst part is over! This process may take a couple of minutes the first time; however after it is done once it can truly be performed in under 5 minutes.
Step 2: Opening the Deer
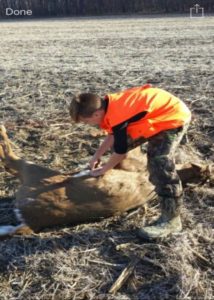
After the anus is taken care of, you will want to open the deer. This will set you up for step 3.
Start by finding the breastbone on the deer. Go directly under the breastbone and use your knife to puncture the deer (about 1-1 1/2 inches) letting all the gasses out. Do not puncture too far because you do not want to cut open the guts of the deer. This would cause some of the meet to possibly get tainted.
Now you will want to put two fingers into that puncture you just created. Place your knife in the puncture and between your fingers with the sharp side up. Pull up with your two fingers to create tension for the knife to cut easier. Do this all the way down the deer’s body until you reach the hind legs.
Once you get there, you need to cut around the bladder in order to not get deer pee all over your meet while still gutting the deer. After that, you are ready to get into the deer’s cavity.
Step 3: Cutting the Diaphragm
The diaphragm is a muscle that supports the vital area of the deer. you can find the diaphragm near the rib cage. You will want to start cutting that all the way around the vital area of the deer. This is the part of the process that gets to be pretty bloody.
Once you have cut the entire diaphragm around the vitals area, you should be able to get most of the vitals and guts out of the deer. There is just one thing holding them in… the windpipe.
Step 4: Cutting the Windpipe
The windpipe is the tube that allows a deer to breathe and is connected to the deer’s lungs. This is why the vital area will not come out. With most of the vitals hanging out of the deer’s body, you should have plenty of room to get two hands into the cavity.
You need to reach up in the direction of the deer’s neck and grab hold of the windpipe with one hand. Then, take your other hand with your knife and carefully cut the windpipe as far up as you possibly can. Be careful not to cut yourself during this because you will be cut based on what you are feeling and not what you are seeing.
This is the step where you really need the elbow-high gloves to keep blood from getting all over you. But now the bloody part is over.
Step 5: Finishing the process
After you have cut the anus, the diaphragm, and the windpipe you should be able to pull all of the insides out of the gutted whitetail deer. You may need to find some spots where fat or a missed cut is not allowing for the release of the deer’s insides. Just make any extra cuts where necessary until all the guts are out of the deer.
You will also want to lift the deer up by the antlers or by the head and drain the blood out of the anus. This will help keep the cavity of the gutted deer dry and preserve meat. Try to also find two or three thick sticks and put them in between the deer’s open cavity. This will allow air to flow in keeping the meet dry and cold from the air.
Good job! You have successfully gutted a deer. But it is not exactly over to keep your meat good.
Step 6: Getting the deer out of the woods.
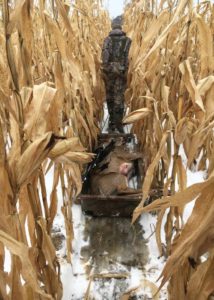
Now that you have a gutted whitetail deer, you need to get that deer out of the woods and into your vehicle. There are a few options that you can use but some are better than others for preserving the taste of the meet.
The way that I get my deer out of the wood is by using a sled that has a lip that can get over larger trees. It is also a great product to use in the snow or mud because it glides over top. It also can fit my backpack, my bow or gun, and any dirty tools that I used to gut/field-dress my whitetail deer.
You can also get a deer cart that has wheels and can make the process quick and easy. The problem comes when you must get over larger trees. A deer cart will also dig its tires into the mud or snow and become extremely difficult to pull. However, the wheels do make it faster on dry flat ground than on a sled.
You can do it the hard old fashion way and drag the deer out by the legs or antlers. This is the most cost-effective because it is free. However, if mud and dirt get into the empty deer cavity bacteria may form and you could lose some meat.
Step 7: Cleaning
I always just try to get back to camp and get a hose. I get some water inside the deer and wash out all the blood and any other guts or fluid that are not good for your meat.
The way I get all the water out is to just lift the deer up and it should all flow out the anus. Just like how you got all the blood out while you were still in the woods.
After that just take it to a processor or process it yourself. That is up to you and how you like to process your deer.
Why Gut a Deer Quickly
You want to start gutting a whitetail deer as soon as you can. This is because the second that life leaves the animal, the body goes into decomposition mode. This causes the deer to get bloated and eventually rot. Imagine when you see a dead deer on the side of the road. They look extremely bloated because their body has been decomposing.
It will make the process of gutting a deer much easier if you can get started gutting the deer as soon as you know it is dead. This will avoid extra gasses (that smell awful) from beginning to form and will help the overall quality of your meet.
Do you Need to Field-Dress/Gut a Deer Before Taking it to the Processor?
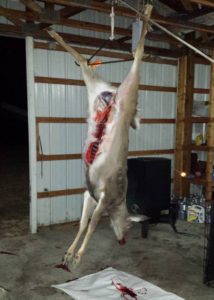
The short answer is yes. You need to gut the deer. At least the insides before taking it to the processor. If you do not they will either reject you or make you pay more money to get that deer processed.
You do not need to skin the deer though. They will do that for you.
How much does it cost to get a deer processed?
This year my dad and I took two deer to the processor and the average cost was around $250. That is just an average where we take our deer to get processed. Call your local processor to see what their rates are for the average weighted deer.
Conclusion of Gutting a Deer
This step-by-step guide may have sounded extremely intimidating; however, after you have gutted a deer 2-3 times it really becomes quite simple. Just take your time the first few times if you are new. Gutting a deer is like anything else in life… it takes practice to become good.
If you have any questions or need clarification, feel free to email me at: loganpetzold@thewhitetailteacher.com
If you want to stay updated on more posts like this follow The Whitetail Teacher on Facebook and Instagram.
Shoot Straight,
Logan Petzold

